Written by Lucas
Edited on
11 August 2023
·
11:50
How do you connect your Philips TV to the internet?
If you want to use the Smart platform of your Philips television, you need to connect it to the internet. In this article, we'll explain step by step how to connect the TV to the internet wired or wirelessly.

Connect your Philips TV to the internet in 6 steps
- Step 1: go to the home screen.
- Step 2: find the gearwheel at the top right.
- Step 3: go to Wireless and networks.
- Step 4: choose Connect to network.
- Step 5: enter your WiFi password.
- Step 6: what if the connection doesn't work?

Step 1: go to the home screen
Go to the home screen of the TV. You can do this by pressing the home button on your remote. You can recognize this button by the icon that looks like a house.

Step 2: go to settings
In the home screen, you can see your downloaded apps and recently used services. At the top right of the screen, you'll see 3 icons. One of those icons is a gearwheel. Go to the gearwheel and click it. This is how you open the settings. With some Philips TVs, you can find 'All settings' at the bottom of the screen.
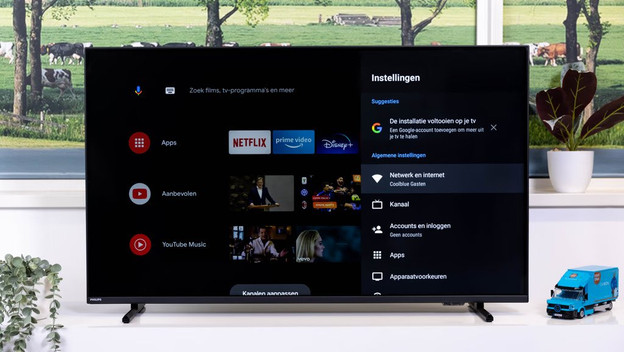
Step 3: go to Network and internet
Scroll down in the settings until you see 'Network and internet'. Select this option.
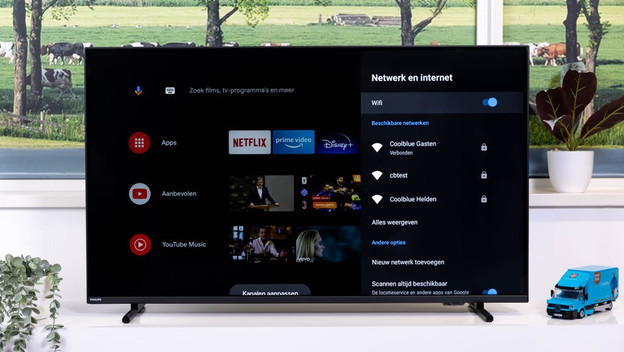
Step 4: choose your WiFi networ
Choose the WiFi network you want to connect to.

Step 5: enter your WiFi password
No select the network you want to connect the television to and enter the password. Your TV is now connected to the internet.
Don't know the password of your network? You can check your network router. You'll most likely find a sticker with the password of your WiFi network.
Step 6: isn't your connection working yet?
Do you see an error code after following these steps? Reset your Philips television to factory settings and try again. Via the link on this page, we'll explain how to reset your Philips TV to factory settings.
Article by Lucas
Television Expert.