Written by Jorn
Edited on
23 August 2022
·
12:54
How do you set up your Philips TV?
You just got your new Philips television. You already unpacked it and laid everything out. Only the setup is left. In this article, we'll explain how to do so step by step.

Set up your Philips television in 11 steps
Set up your new Philips TV by going through the steps of our expert.
-
Step 1: before you start
-
Step 2: select your language
-
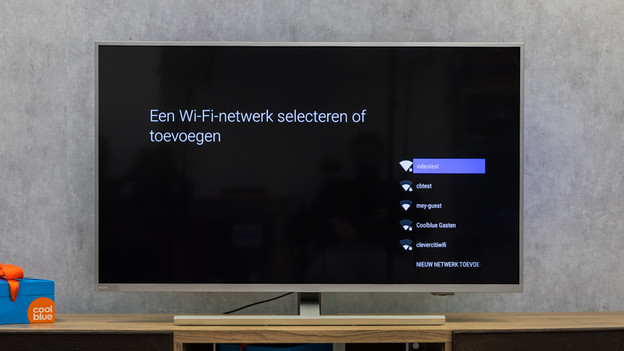
Step 3: connect to the WiFi network
-
Step 4: log in
-
Step 5: set your preferences
-
Step 6: take a quick tour
-
Step 7: select your country
-
Step 8: select 'Home use'
-
Step 9: sign up with the Philips smart TV server
-
Step 10: set up the channels
-
Step 11: set up the online privacy settings

Step 1: before you start
Before you start wit the steps, keep the following in mind:
-
Put the TV in de desired spot.
-
Make sure you have a working WiFi connection.
-
Do you watch live TV? Connect your TV to a TV signal via the box of your provider, a CI+ module, or a coax antenna cable.
-
Put batteries in your remote.

Step 2: select your language
Select the language you speak and prefer to read the menu in.
Step 3: connect to the WiFi network
Choose the type of network you're using. Do you want to connect the TV to your router or modem via an Ethernet cable? Choose 'with cable'. Ensure a properly working WiFi connection if you choose 'Wireless' and go through the following steps:
Wireless:
-
Select the option 'Wireless'.
-
The television will look for WiFi networks.
-
Select the desired WiFi network.
-
Enter, if required, a password.
-
Connect to the WiFi network.
Select wireless.
The television searches for WiFi networks
Select a WiFi network
Enter possible WiFi password.
The television will connect to the WiFi network
The television will be connected to the WiFi network




Step 4: log in
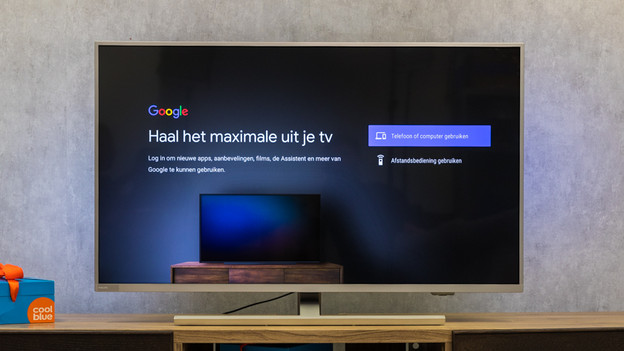
Select the option 'Log in' and choose one of the 2 log in options. Click 'Skip' if you don't want to use the Google services.
Use a phone or computer:
-
Select 'Use phone or computer'.
-
Go to androidtv.com/setup on an appliance that's connected to the same WiFi network as your Philips TV.
-
Enter the code that's being displayed on your screen.
Use remote:
-
Select 'Use remote'.
-
Enter email address and password with the remote.
Click 'log in'.
Use phone or computer
Go to androidtv.com/setup and enter the code.
Use remote.
Select 'Continue'.



Step 5: set up your preferences
Set up your preferences for the following settings:
-
The location services
-
Help to improve Android
-
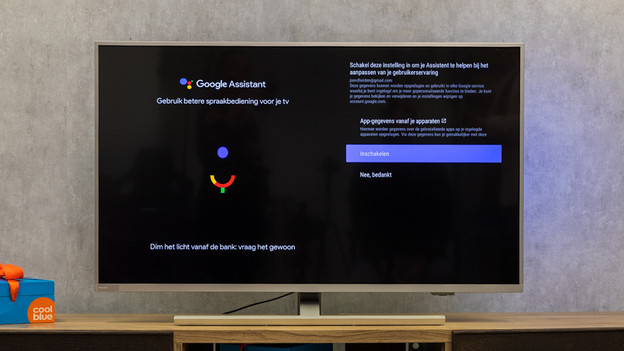
Google Assistant
-
Personal results
-
Emails on new Google Assistant functions
-
Install extra apps
Set up these preferences according to your own liking. Your television will explain every setting.
Set up your location settings.
Choose yes or no.
Turn on Google Assistant.
To turn on Google Assistant or not.
Select 'Continue'.
Select 'Turn on' or 'No, thanks'.
Select 'Yes' or 'No' according to your preference.
Install or don't install extra apps.




Step 6: take the quick tour
Click through the quick Android TV tour and read more on the following steps:
-
Download apps via Google Play.
-
Talk to Google Assistant.
-
Cast to your TV from a mobile device.
Start the tour.
Download apps via Google Play.
Talk to the Google Assistant.
Cast to your TV.


Step 7: select your country
Select the country you live in.

Step 8: select 'Home use'
Select the option 'Home use'.

Step 9: sign up with the Philips smart TV server
Click on the option 'Sign up now' and create an account. This will give you access to the online functions by Philips. Do you prefer to do this another time? Click 'Later'.
Step 10: set up the channels
If you want to receive the channels via satellite, select the 'Satellite' option. If you prefer to use an antenna or cable, select the 'Antenna/Cable' option.
Antenna:
-
Click 'Start'.
-
Select 'Antenna'.
-
The television will search for channels.
-
Click 'Finished' if it worked. Didn't work? Click 'Try again'.
Cable:
-
Click 'Start'.
-
Select 'Antenna' or 'Cable'.
-
Select your cable provider.
-
Choose analog and/or digital channels.
-
Start searching.
-
Enter the possible network frequency.
-
Enter the network ID.
-
The television will search for channels.
-
Click 'Finished' if it worked. Didn't work? Click 'Try again'.
Select 'Install digital/cable'.
Select 'Start'.
Select 'Cable'.
Select your cable provider.
Select analog or digital.
Set up your network frequency.
Select your network ID.
Searching has been completed.


Step 11: set up your online privacy settings
Select 'On' or 'Off', depending on your preference. With this, you allow television channels to display online services on your screen while watching a channel, like a personalized TV guide. You can always change this later, even by channel.
The set up is done! Your TV is now ready for use.
Article by Jorn
Television Expert.